Orthodontics in the laboratory - Clear aligners
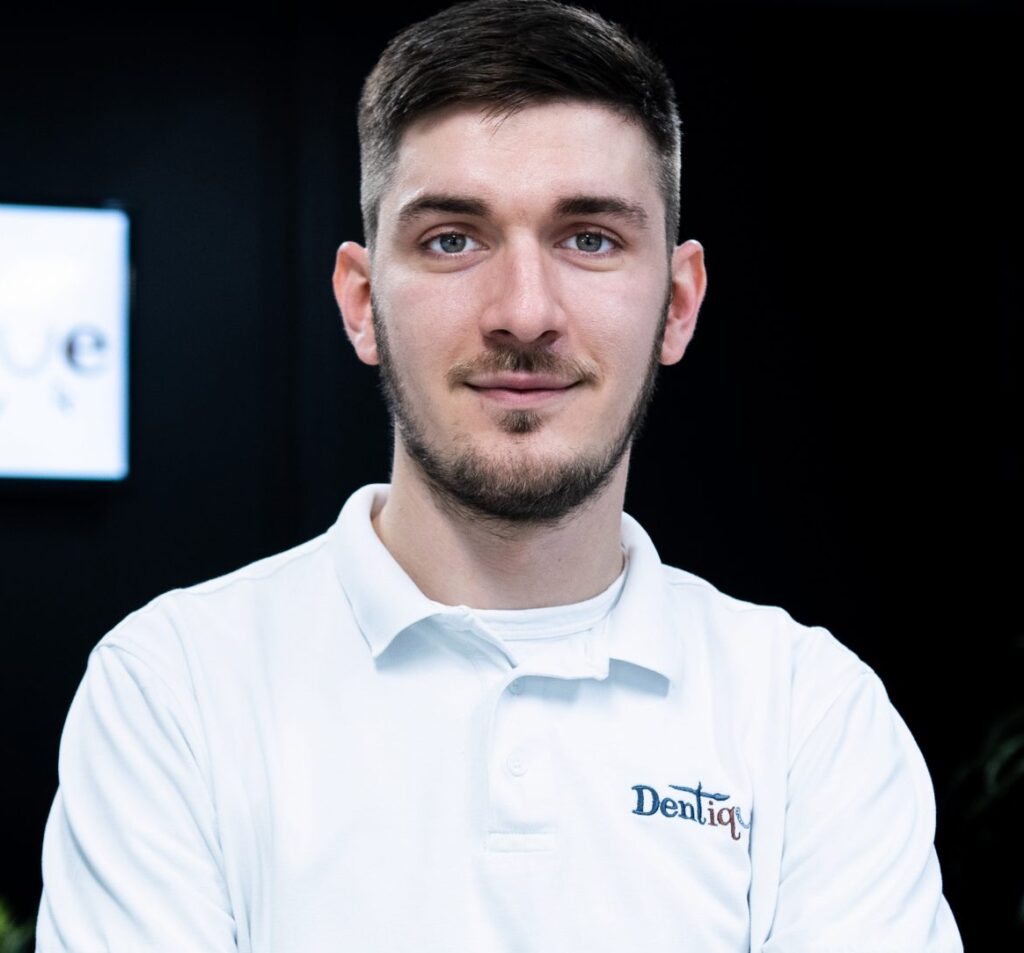
Author: Josip Pecevski
Contact and name of the laboratory or practice:
Dentique lab – Private practice of dental laboratory ˝Josip Pecevski˝, ulica grada Chicago 25, 10 000 Zagreb
INTRODUCTION:
Design of orthodontic movements with clear aligners.
Aligners are active splints that, due to their shape and the properties of the material from which they are pressed, gradually and graduatedly move the teeth in the direction given by the current splint. Until about 15 years ago, laboratories actively participated in the production of orthodontic aids for patients together with orthodontists and facilitated their daily procedures with patients. With the arrival of some new times, some procedures in orthodontic offices were lost, and more and more cases began to be solved with the classic method of wires and brackets. As times continued to change, and laboratories became more and more innovative and digitized, the time returned when laboratories in the future will be forced to know at least the basics of orthodontics and will be forced to introduce into the service of their laboratories a part of orthodontics that has been lost for years. Virtually any situation can be solved orthodontically with digital systems today, it is necessary to research and learn these methods, and due to the lack of additional higher education for technicians in the Republic of Croatia, this responsibility is on us.
Figure 1: Note that all orthodontic work performed in the laboratory should be done in collaboration with an orthodontic specialist who would have to be the bearer of such work either as the bearer of the work or as an intermediary between the doctor’s office and the laboratory.
The first stage after receiving the scan or scanning of the plaster model is the analysis of the situation with the help of scans and photographs of the patient. In the analysis, the orthodontist studies all the information obtained and assesses which movements are possible and which realistic results we can expect. After analyzing the situation, the orthodontist transmits to the technician designer information in numerical form that the tooth must not exceed a certain level and degree of inclination, rotation, angulation, translation, etc.
After the received information, we can continue with the design.
Figure 1.
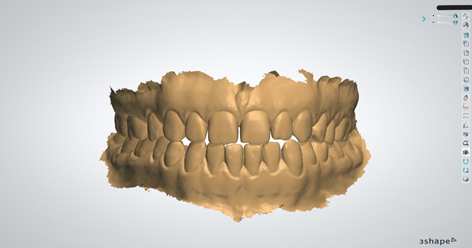
Figure 2: The second design phase begins with the creation of orthodontic models in a digital version from our already uploaded scans. In the first step, we mark the edge of the print we need, which is usually determined 1 mm from the edge of the end of the scanned object. It is important for us to have as much soft tissue as possible so that we can later maneuver with the amount of splint cut once the models are printed and when the splints begin to be compressed. The same process is performed on both the upper and lower jaws, and it is mandatory in orthodontic work to have both jaws scanned, even though one jaw may not be worked on. Every tooth movement affects both agonists and antagonists, so it is mandatory to have a scan of both jaws.
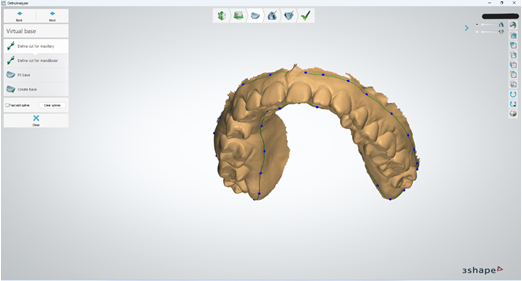
Figure 3. After marking the edge line of the scan that we need for the design, the step of making the model base follows. In our options, we have various model making options, from alveolar to models with full bases. However, the most efficient model for the clear aligner procedure turned out to be the model in which only the tooth row is printed, because the vacuumformer has much more vertical suction power when we thermoform the splints. It is also important to emphasize that the models must not be too tall, so that the vacuum former does not lose its suction power unnecessarily, nor must the model be too thin, because it could cause deformation of the model at a high temperature of thermoforming. The optimal height of the model is approximately 22 mm from the bottom to the highest point on the model.
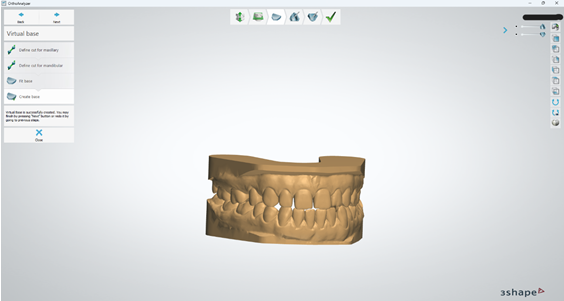
Figure 4. After the design of the model in the shape according to our own preferences, the preparation of the model is completed and the marking of the anatomical structures and the position of the teeth begins. The first step is to mark the width of the teeth. On each existing tooth in the dental row, we must mark the mesio and disto-proximal point on the widest parts of the tooth crown. It is very important that the points are not too low approximatively or too high approximatively because this is one of the phases in which the system algorithm takes information and automatically segments the teeth in a later phase so that they can be moved individually.

Figure 5. In the last phase of preparing the model and the anatomical structure, we approach marking the vertical axis of an individual tooth, which helps the system to roughly estimate the root width and direction if we do not have a CBCT. It is done similarly to the determination of the direction of insertion of prosthetic works in fixed prosthetics. We look at the tooth occlusally in the optimal direction, which allows us to see as much of the tooth structure as possible, and we fix that position, performing the same action for each individual tooth. After the vertical direction of the teeth on the occlusal surfaces and on the incisal edges, we have to mark the points that the system is looking for in order to recognize which tooth is rotated by How much. On the molars, we must mark the MP-cusp, DP-cusp, MB-cusp, DB-cusp and the fissure center. On the premolars, we must mark the palatal and buccal tips of the cusps. On the canines and incisors, we must mark the mesio-proximal and disto-proximal points.
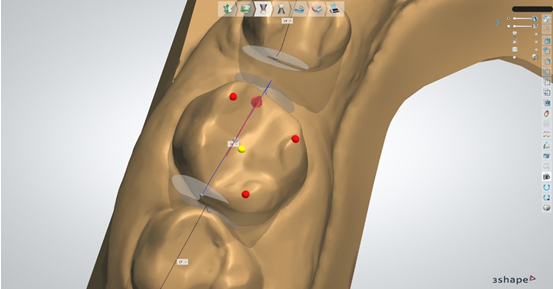
Figure 6 and 7.
After completing the previously mentioned stages of creating the model and marking the tooth structure, the system has enough information to estimate the border of the anatomical crown of the tooth and the position of the gingival edge of each individual crown, and marks each individual tooth with a dotted line. Here we have to carefully check the line marked by the system and, if necessary, correct it so that the line covers the tooth as much as possible. If we are not satisfied with what the algorithm determined, we will either redo the edge with point edit or free form and then compress the calculation. After the calculation, the system will segment each individual tooth and, in the digital design, separate it into several smaller stl files that represent each individual tooth and the model base without teeth.
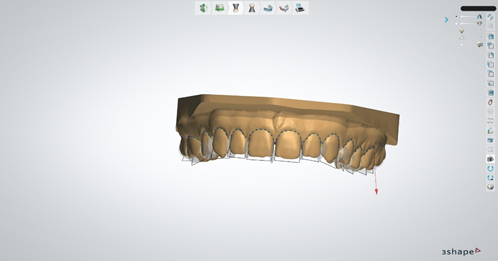
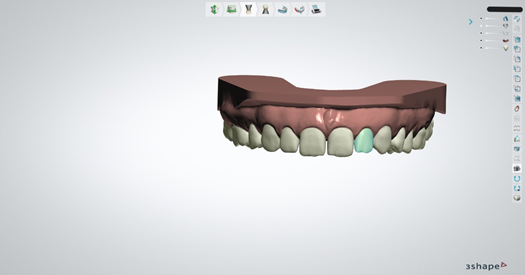
Figure 8. If we are satisfied with the segmentation of the teeth, we must study the instructions of the orthodontist, who would have to give us exact information on which teeth and in which positions he wants us to place the so-called attachments. Attachments are small composite forms that are applied to the teeth that the orthodontist has assessed as the most optimal for setting up the attachment. They, in combination with a splint, significantly accelerate tooth movement, and with them we can expect better, more stable and faster results. The form of attachment can be varied and also here the orthodontist must choose the form of attachment that suits him best. There is also the possibility of dimplings, which instead of attachments that stick to the tooth serve as negatives in the splint that push the tooth harder in the desired direction.
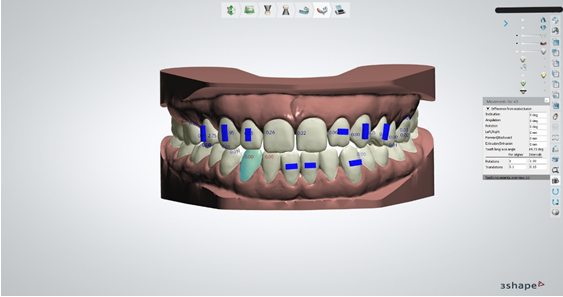
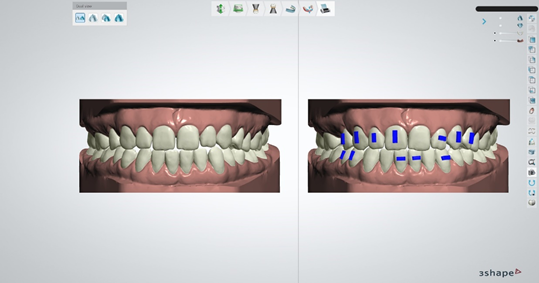
Figure 9. After all the completed phases, we actually approach the shortest phase, and the most important one, the replacement of the teeth itself, which in design is very similar to the replacement of teeth in a mobile prosthesis in the wax phase. Our job is to bring the teeth to the position determined by the orthodontist in as precise a position as possible, respecting the amounts determined by the orthodontist for movements such as mesialization, distalization, intrusion, extrusion, rotation, angulation, inclination, etc. We can be sure of that, because for each shift we make for a single tooth, the system throws out the amounts of the shifts we make. If the desired position of the teeth exceeds the values set by the orthodontist, then an additional consultation with the orthodontist is definitely necessary to assess whether the excessive value will lead to unwanted recession.
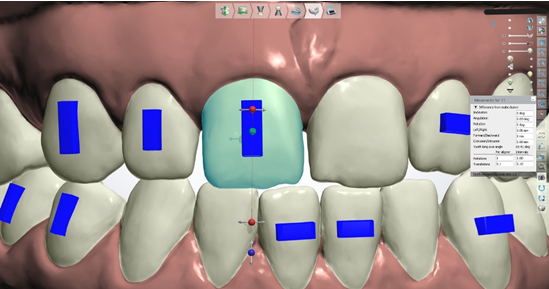
Figure 10. After all the movements performed, we export the videos of the movements in all directions, take pictures of the comparisons of the movements in the initial and final stages, and send the files together to the operator (practice), the orthodontist, and the patient for analysis and assessment as to whether any more movements should be performed. What all major aligner manufacturers suggest is to be guided by the principle of overachievement when moving, in order to be sure that the results will be as precise as possible at the end of the therapy. The system algorithm itself calculates how many splints are needed based on the information we set for it, in which amount of rotation and translation we want each individual splint to work for us, and generates models and the number of phases required for the desired results. What can certainly be expected, because after the end of the therapy, another one with several splints will be performed as a kind of refiment.

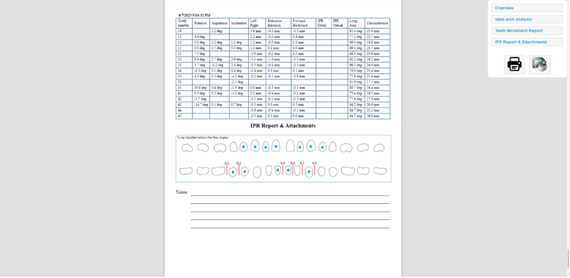
Picture 11. And 12. When everyone involved in the therapy approves all the movements and the final results based on the video, pictures and the ortho report that shows us all the movements done, one by one for each tooth, one for each stage of the splint and the orthodontist where the attachments are to be placed, we continue with the creation of aligners where we generate models that we print and on which we thermoform the splints.
By changing the environment around us, where the methods of dental services try to be as minimally invasive as possible, laboratories lead to the need for additional education, which today is getting harder and harder to access. Laboratories need to start thinking about how to become more competitive in the market so they can neutralize all the difficulties that dental technology is struggling with in our community today.